Description
Lamborghini
part number
OEM
details
Notes
note 2

pump, electric, Bendix
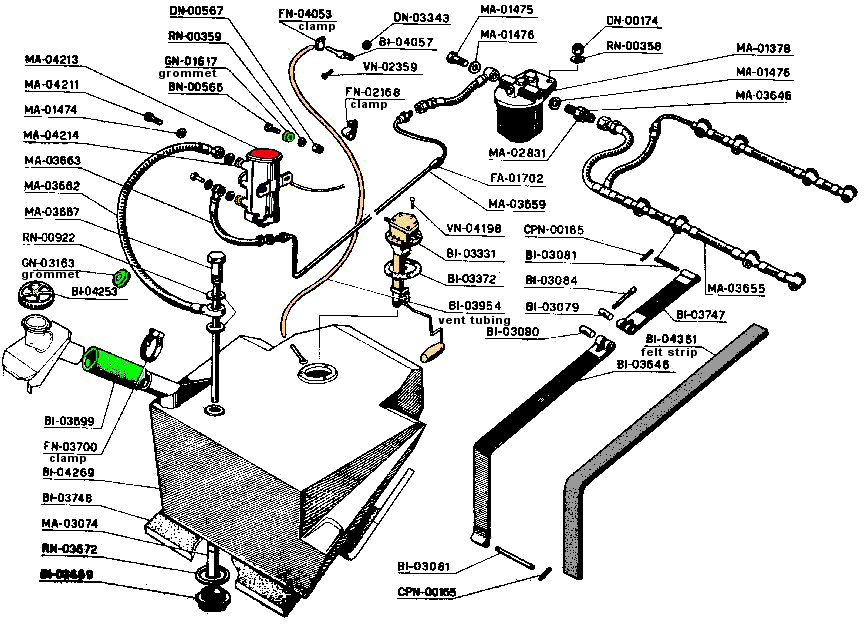
MA-04213
Bendix, Elmira, #480532, neg.12v
red top
small sediment filter in base cap

cap, gas tank fill
BI-04253
gas tank cap
tappo serbatoio benzina
bouchon reservoir
black plastic
used on  Lambo 350/400, Ferrari 275/330, and ?

pin, strap - 2ea
BI-03081
6 x 60 steel pin, 2mm holes on 56mm center
black


pin, cotter - 2ea
CPN-00155
2mm cotter pins
plain


screw, draw
BI-03084
5 x 0.8 , slotted, cylinder head special
black


pin, strap draw
BI-03079
12 x 30mm, 6mm hole, 2.5deep x 10across recess flat, steel
black


pin, strap draw
BI-03080
12 x 30mm, threaded 5 x 0.8 , steel
black


strap, gas tank short
BI-03747
1 x 30 steel material, 110mm center eye to eye, 12mm width slot thru large eye, spot welded end loops
black paint


strap, gas tank long
BI-03646
1 x 30 steel material, 605mm center eye to eye, 90 bend @118mm from large eye center, 12 mm slot, spot
black paint


filter, pick up
MA-03074
SALVA, 10mm ID x 15.3 OD x 80mm overall length
nylon mesh
see photo

fuel pick up pipe
MA-03667
banjo fitting with brass pipe brazed in
 non-magnetic
see photo

gasket, copper washer
RN-00922
18.05mm ID x 30mm OD x 1mm thick
copper


vent fitting
BI-04057
aluminum  fabrication, simple straight thru vent
unpainted


tubing, vent
BI-03954
green, Cavis, 6mm, plastic tubing
green plastic


screw, machine oval
VN-02359
4.0mm x 0.70 x 10mm, oval head, straight slot, brass, chrome
chrome


screw, machine round
VN-04198
4.0mm x 0.70 x 30mm, round head, straight slot, steel
clear zinc


nut
DN-03343
4.0 x 0.75, brass
brass


clamp, band - 2ea
FN-02168
8830111
steel, simple P loop, 10mm wide, 6mm hole, loop to fit OD of green Cavis vent tubing
black


screw, sheet metal,
not shown
VN-02847
8700405
to fasten FN-02168, Panhead, Phillips, sheetmetal screw 4.8 x 9.5 Din 7981 / N
clear zinc


gasket, red fiber
MA-01474
14 x 10 x 2 red fiber gasket ring


gasket, red fiber
MA-01476
20 x 14 x 2 red fiber gasket ring


gasket, copper
RN-00922
8401804
annealed copper washer 18.2 x 30 x 1
copper


gasket, copper
RN-03672
8404001
copper washer 40.2 x 54 x 1.5 copper


gasket, paper
BI-03372
6205360
fuel level sender gasket paper or elastomer
black neoprene


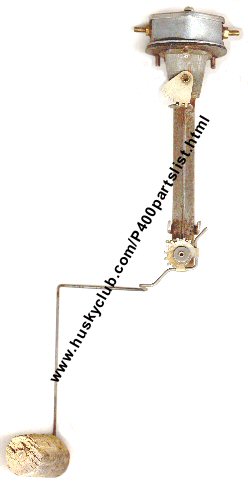
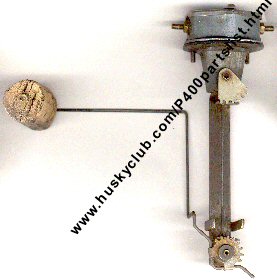
sending unit, Jaeger
BI-03331

clear zinc


float, sending unit

OEM cork float dimension - 28mm dia x 42mm long x 2mm bore
Model A Ford float can be a direct replacement for Lamborghini Jaeger float
cork or better
http://www.mikes-afordable.com


Bendix electric fuel pump:  They are still made by Facet (who bought somebody who bought Bendix) and the correct version for the 4.0L Lambo engine is available from several sources.

http://www.facet-purolator.com/mcl/media/technology/hd_pdfs/Cylindrical.pdf

You must be careful in this pursuit of electric pumps - many pumps are 1/8"-27 npt internal thread inlet/outlet and this is not correct!
What is correct and original size is 1/4"-18 npt internal thread inlet/outlet (480532 and 480534 are the only numbers i know of that have these correct inlet/outlet.)  look at chart above!

09/2007 - Bendix or Facet numbers are stamped in mounting feet. Number system has been used since 60's. Most times these numbers are hidden by grommets.
Bendix / Facet  number
Rating
size
automotive known as
notes
source for purchase 2007
aprox price
480532
12V
neg
45gph/5.0psi 1/4 npt
competition
red top
early Bendix pump - entire pump dome is painted red, the later Facet pump - red dot sticker pasted on.
The OEM Bendix is silver Zinc plated, while the later Facet has been chromated to a gold color. Also a change in the electrical fitting.

Truechoice Motorsports
40 Industrial Park Place
Powell, OH 43065
www.truchoice.com

$93


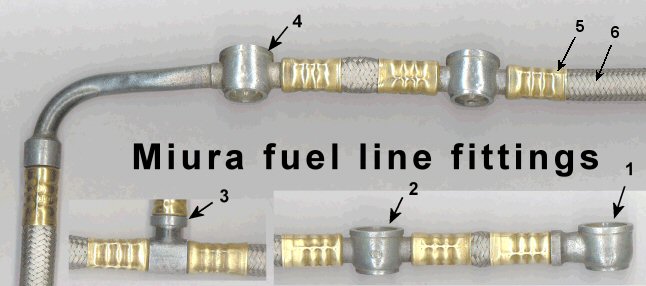
Miura replacement fuel line circa 1976 maybe earlier - #5 ferrules are stamp marked - scovill, made in us, 7325

tool for crimp shown on Miura fuel line (circa 1976) - http://www.fastenal.com/web/products/detail.ex?sku=5229-CV500
ferrule 7325 -  http://www.fastenal.com/web/products/detail.ex?sku=03093716543
maybe this is an option for others - i still need a lead on the fittings please
2007 update on fuel line - in order to achieve a more original looking fuel rail, the desired ferrules (same as above) should be silver zinc plated prior to crimp. also the crimp tool should not be so agressive as shown, what is now preffered is a four sided, smooth jaw crimp leaving a smooth crimped ferrule. The finished look is more like the OEM 1967-1972 era fuel rail.
MA-03682 fuel line from tank pipe MA-03667 to the Bendix fuel pump MA-04213/MA-04214. The braided meatal is magnetic, the ferrules uncrushed aluminum, the banjo are different sizes of course but with same threadin for the fuel line. The braid is not skived, and in fact, once the fittings are threaded out, the braid is loose enough to allow slipping off the hose and replacing hose.

MA-02831 (above arrow is drawn to the wrong item) Same fitting type, fittings are brass with clear or silver zinc plating. dimensions given for the non-crush style ferrules.
MA-03663 fuel line from Bendix to solid fuel line to rear


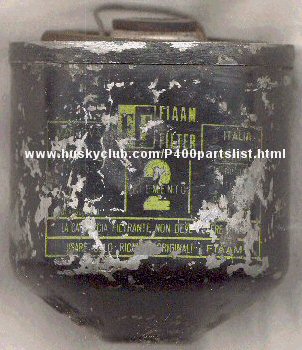
top view Fiamm fuel filter
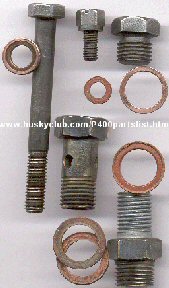
Fiaam fuel filter hardware
red paper gaskets
clear zinc plated hardware
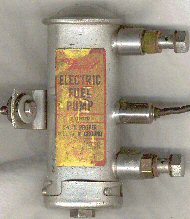
Bendix "Elmira"
Photo shows an unrestored 1968 Bendix from a 1968  Miura
One of the amatuer restoration mistakes is the placement of
the Bendix sticker. While the sticker would look nicer on the
forward side, it is only correct on the rear side as shown.

There are three different Miura mount styles for this Bendix
electric fuel pump.
Early Miura style, late Miura style, wrong Miura style.


http://www.mikes-afordable.com/page/MFP/CTGY/1067 - three 1928-31 Model A Ford/64-74 Lamborghini float choices for under $10

    Happy New Year 2012 and the VERY best wishes to you all this for this one.  Just wanted to share a little gem for those who are doing those 'clean up some rust' jobs. I had to clean the tank before re-installing to 3288, but found both what appeared to be heavy surface rust and some kind of polymer de-rust/sealand compound in the tank.
    The Miura tank design and 4 internal baffles made it a pain to try and clean properly, so cut a hole for access and to scrape the sealer out, but then still had the problem of rust on the non accessible side fo the baffles.
    Using a battery at first, then a battery charger (for reasons that will become apparent), I now have a beautifully clean steel tank ready to have the patch rewelded in place and refit.
General instructions for de-rusting parts or tanks.
1. Carbonate of soda (washing soda) in solution as the electrolyte.
Fill the tank (or a bucket with a solution of one cup washing soda (or you can use bi-carbonate of soda) crystals to 20 litres water.
2. Place a cleaned steel bar down through the filler spout (or in the bucket solution). Wrap sponge rubber or some kleenex cloths round the bar so it won't short to the tank/parts.
3. Hook the positive from the battery / charger to the bar.
4. Hook the negative to the tank exterior (or item to be de-rusted).
5. Initially the current could be 10 amps or more, so I used a battery first.
The current will drop down as the rust is removed into the solution (and if you have a weaker solution of carbonate/bi-carbonate) and a battery charger is more appropriate then for a longer time running (mine is a max of 6amp).

The rust is removed in a kind of 'line of sight/closest first' manner.
I swapped to three smaller bars, placing these in behind the baffles to get the rust from those more directly.
This also loosened the last pieces of 'sealant' that I couldn't get to, which were affixed to the tank by what appears to be a rust converter/inhibitor ingredient. That released when the electrolysis occurred.

I cleaned the bars of the build up of rust a few times. As the water was so discoloured, I changed the solution 4 times in the first 12 hours. Trick is to get the electrolyte solution covering every bit of rust, which for me included the underside of a flat top surface!! Left it running overnight (another 20 hrs)with a clean (weaker) solution and .....  10am New Years eve, the tank was spotless inside.

Washed out with water and dried with compressed air. I noted that a coppery colour begins to form almost immediately (rusting process starts!) so sprayed with some CRC and all good.Will follow up with a little petrol and oil mix as soon as the patch is welded back into place and cleaned off.
    Please note a couple of things though;
1. This is for rust on steel. (Alloy or carbs could need a different solution.
2. The electrodes will suffer if immersed in the solution!  Two of my spring clips got electro eaten overnight.

Hope this helps some of you fine fellows this year. Cheers and ciao
TonyO (in supposedly summertime NZ, but dodging tropical storms for a 10 days stretch this Christmas! Go figure).